The last few weeks have been quite chaotic while working through the upcoming sale of our home and the new purchase of our downsized residence. We encountered several challenges with home inspection items of the home we are selling. This took weeks to resolve. We took on some quick remodel projects on the new residence, all needing to be finished in less than 3 weeks during two holidays, it has been intense experience!
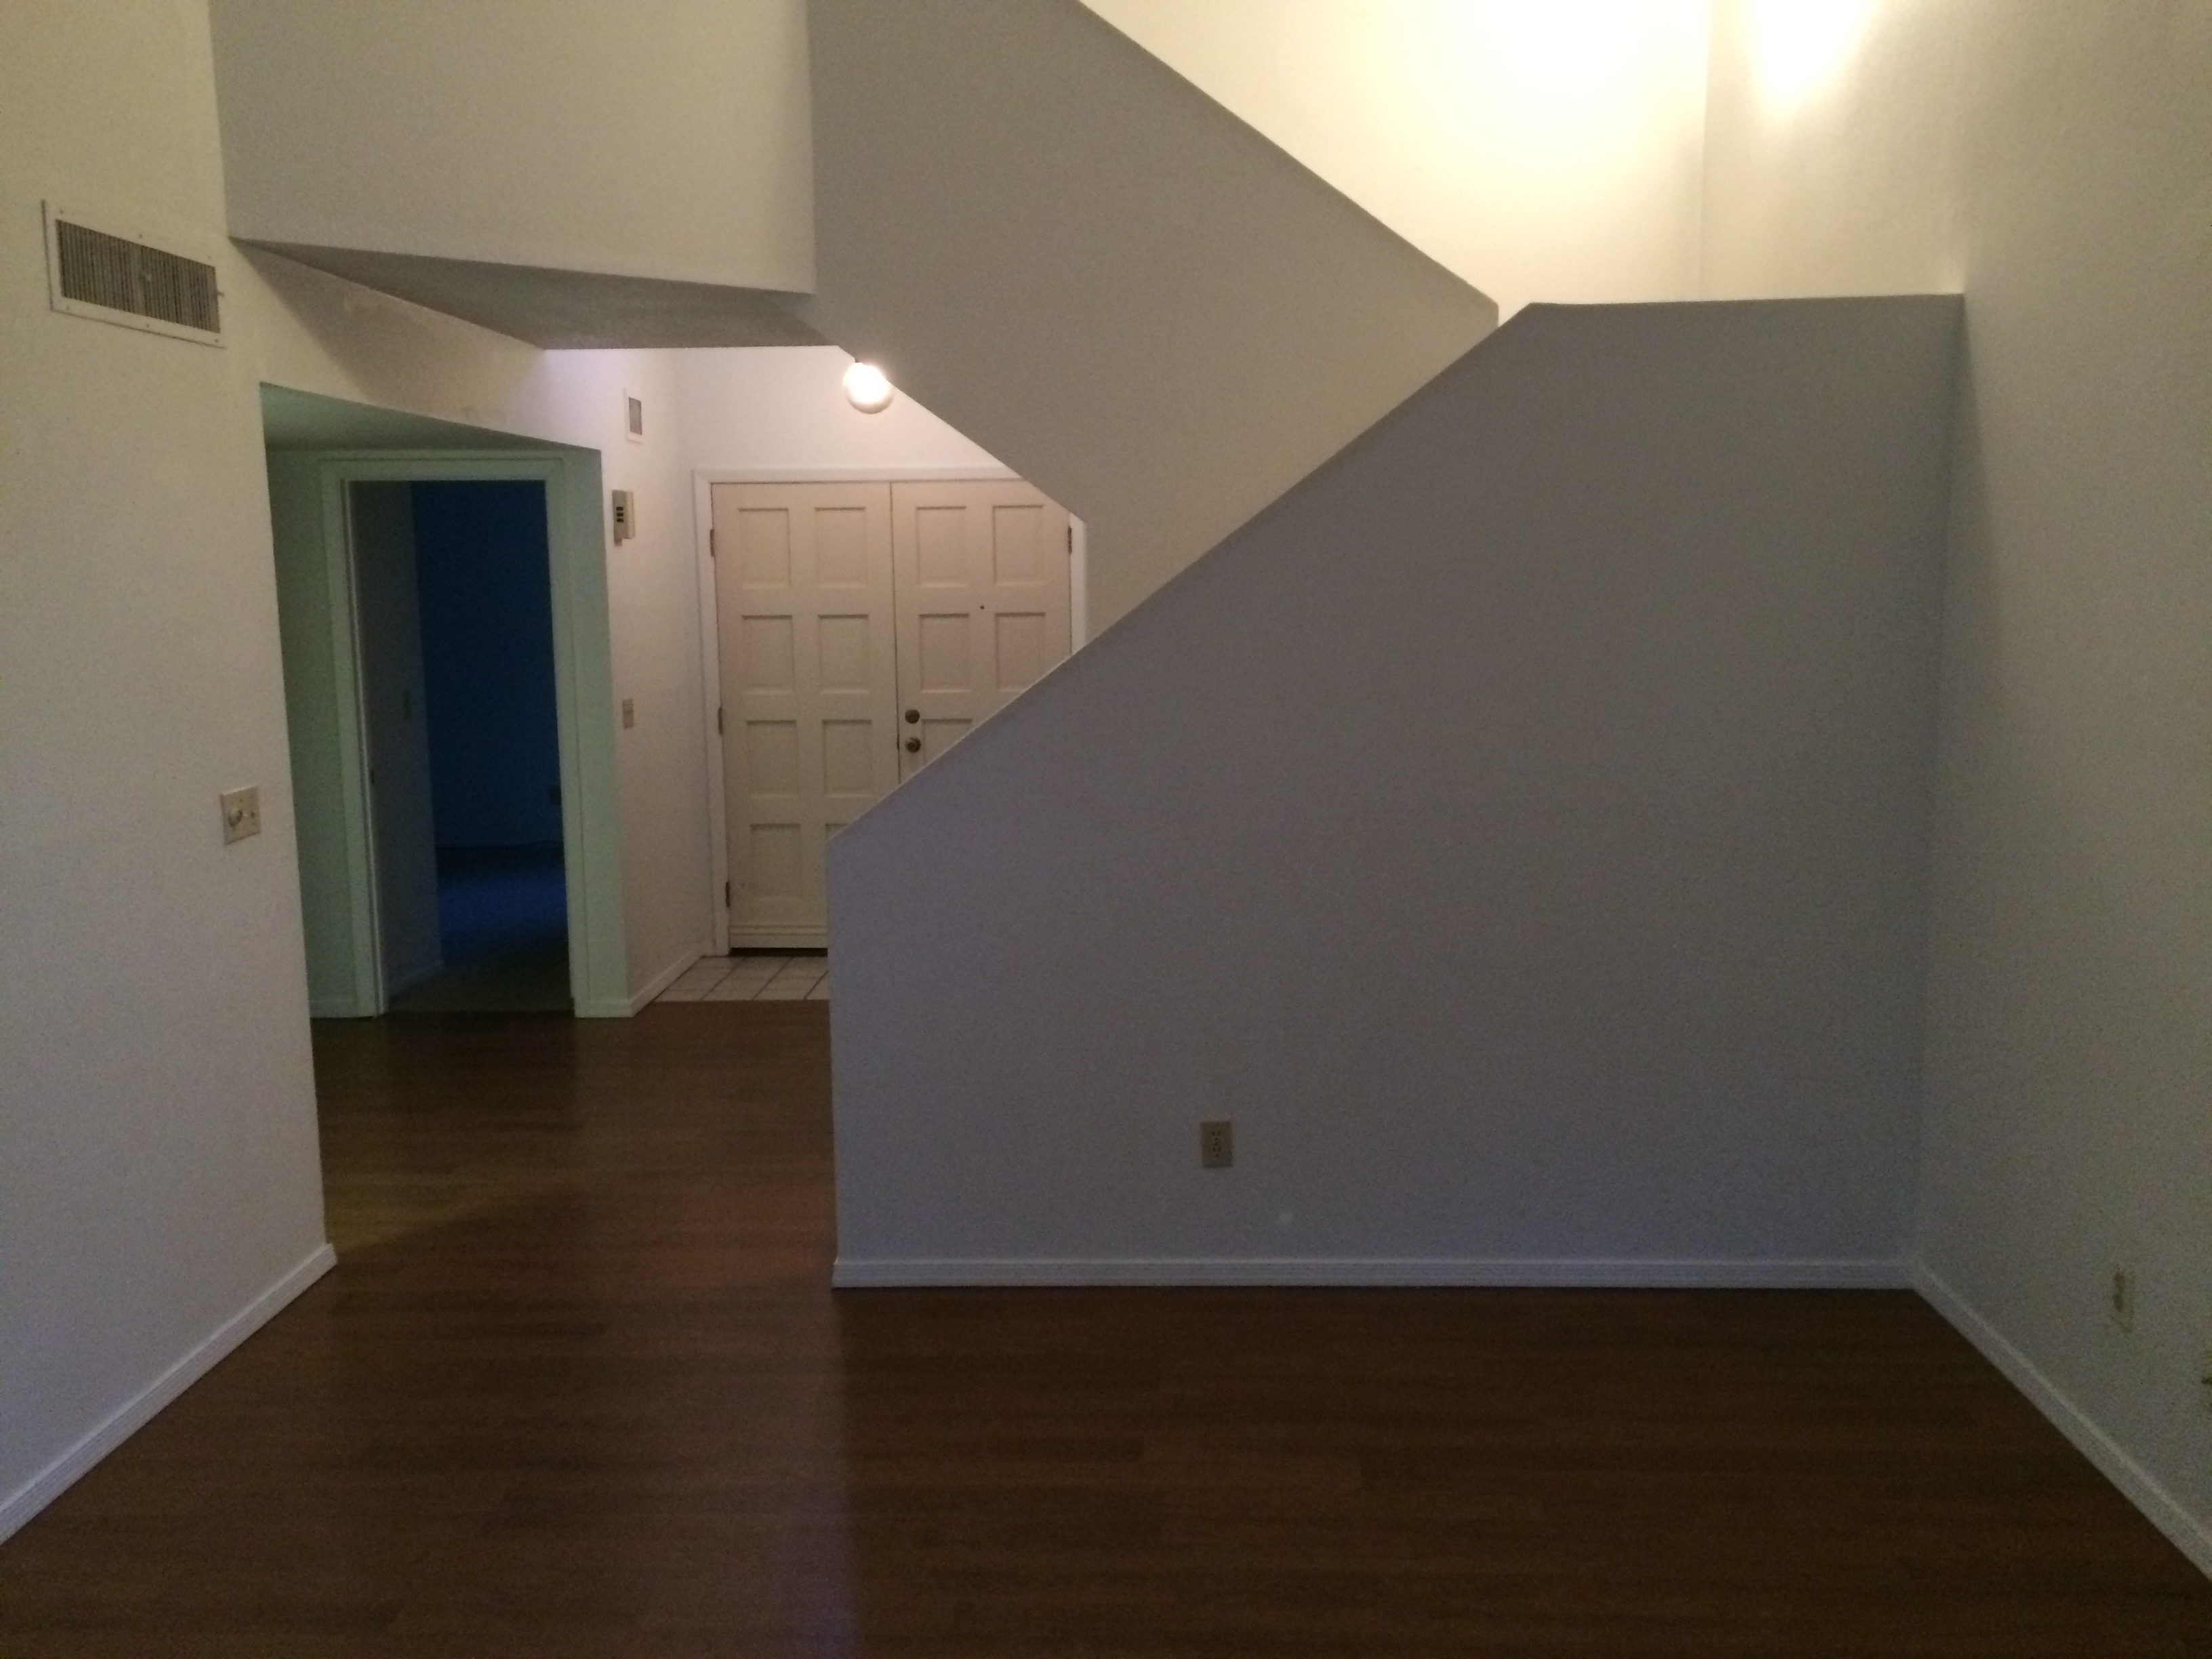
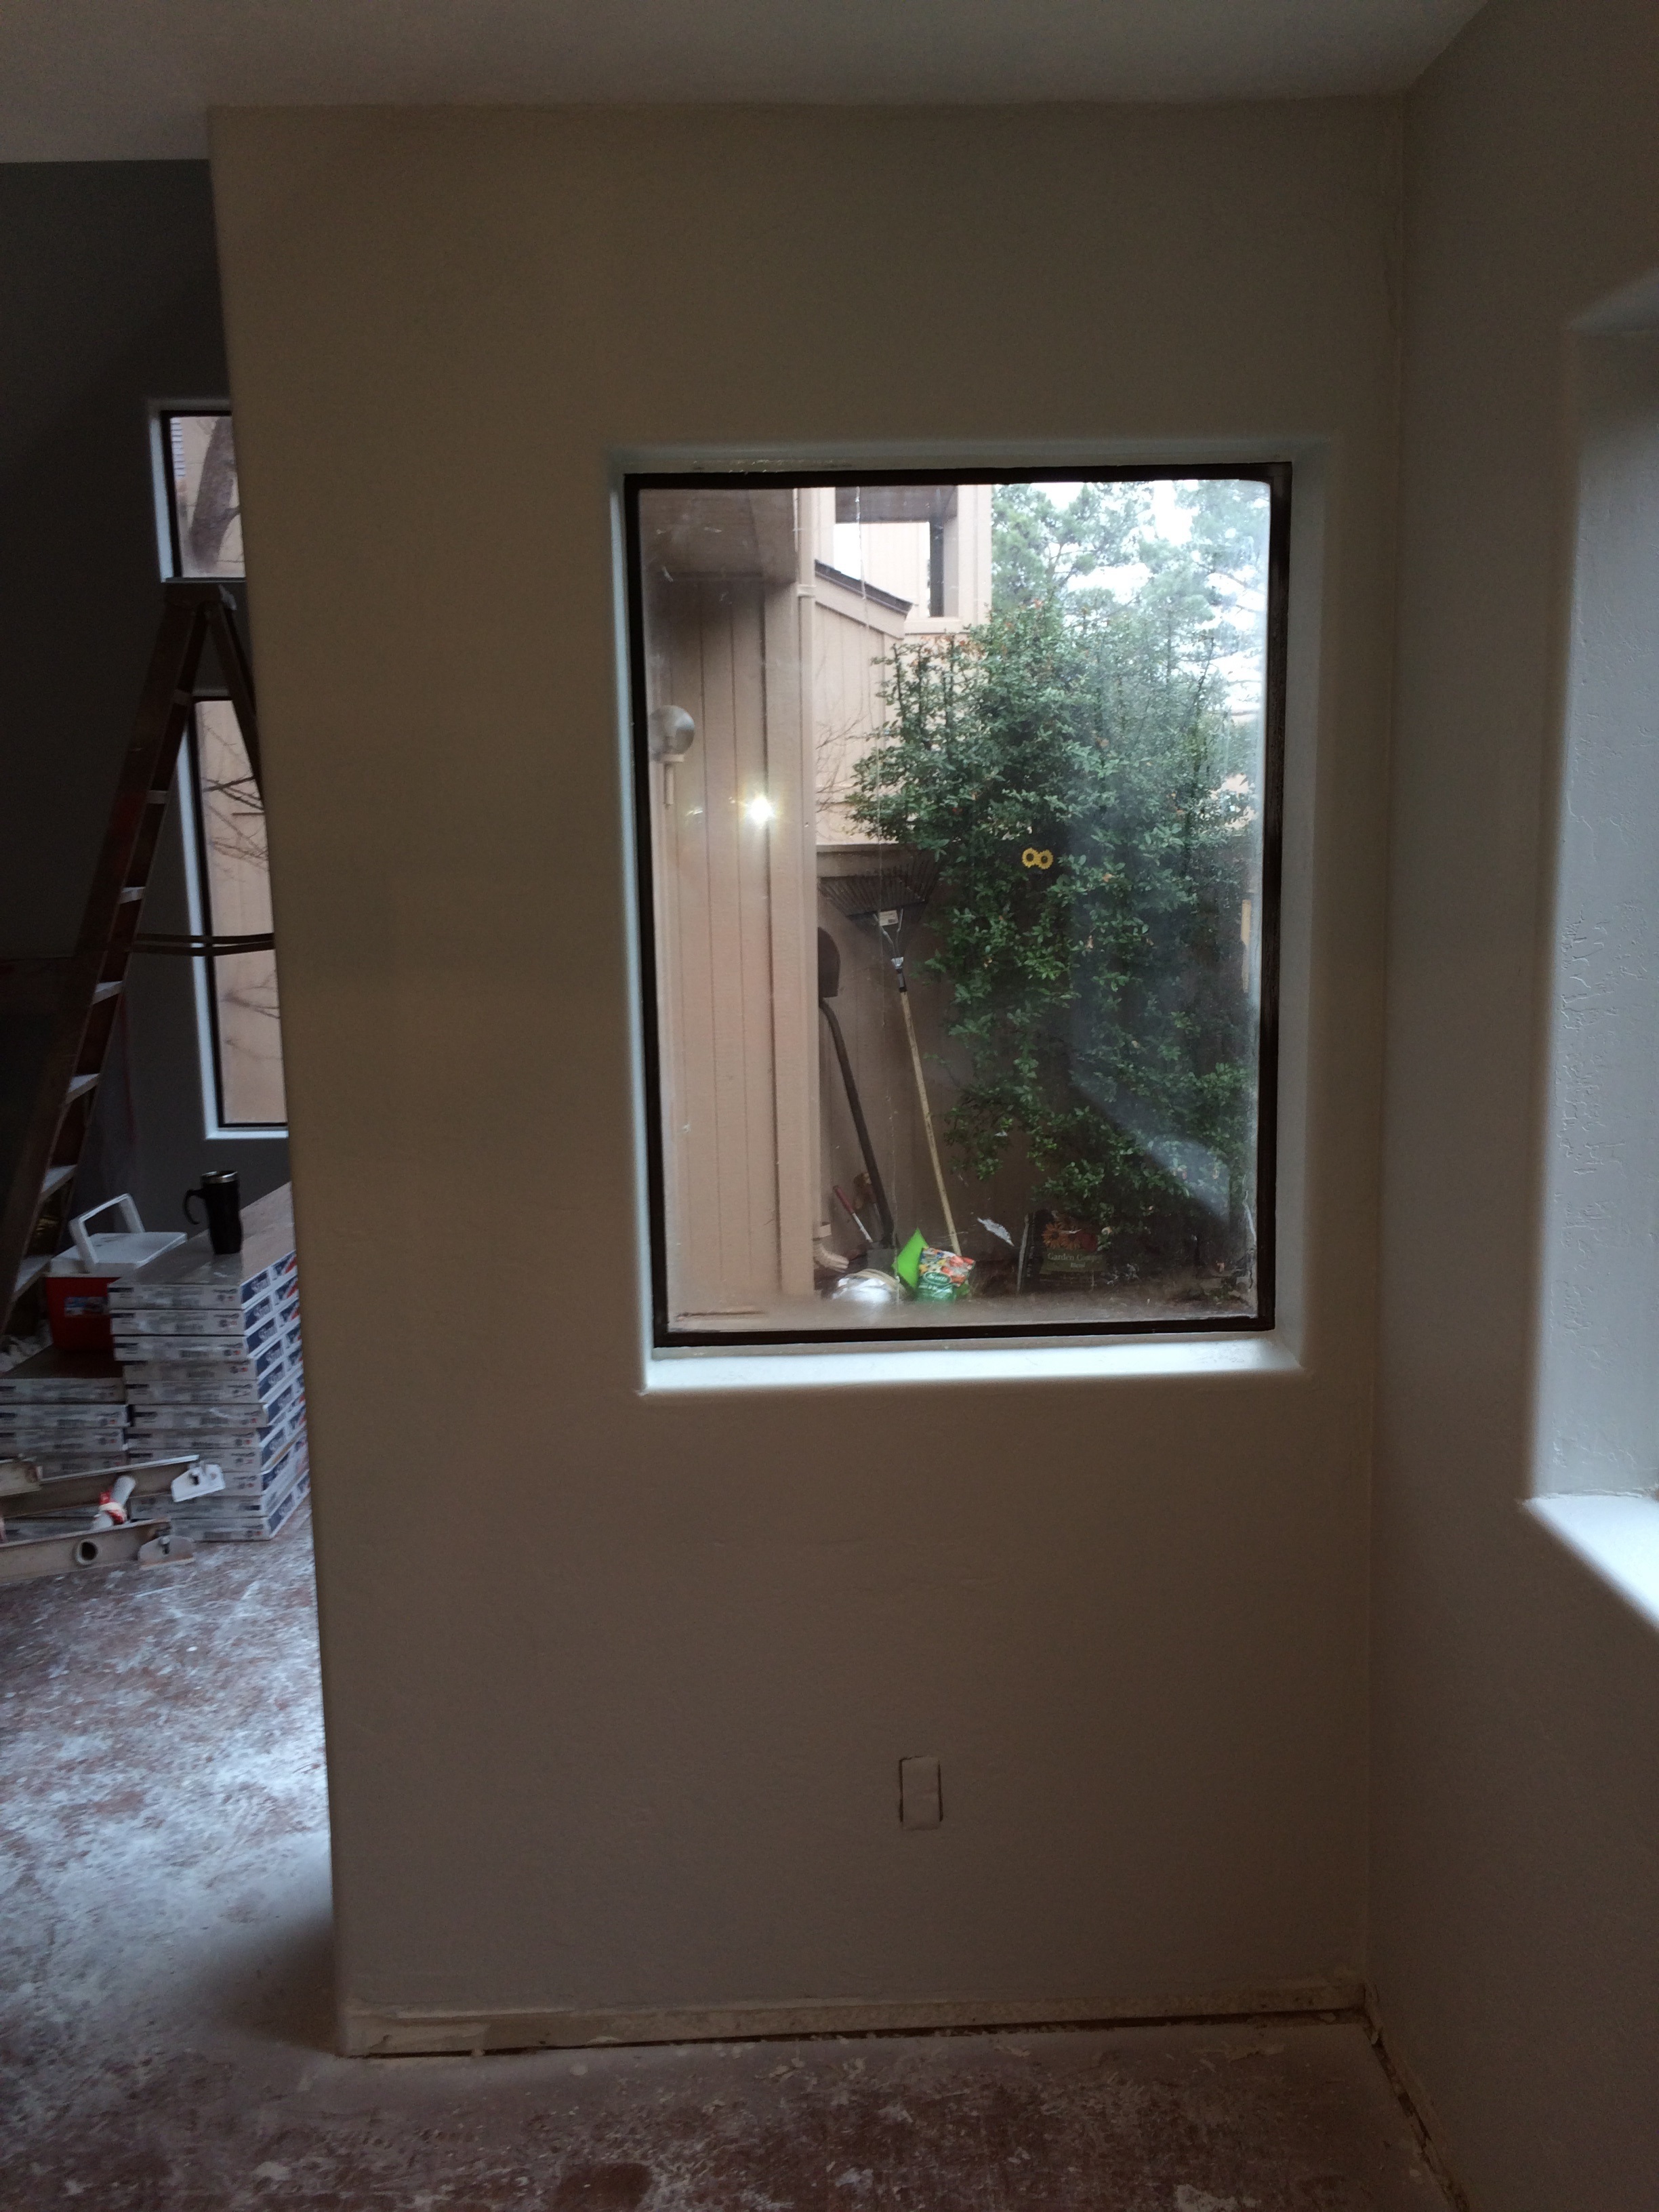
As an outsider looking in, you might look at this “before” picture and comment:
“Hey that looks pretty nice. What is wrong with leaving it the way it is? It appears to have new laminate flooring and the paint looks OK.”
Have you ever looked at the online real estate pictures of homes and then were sadly disappointed after you have actually seen the place? This is a good example of how a picture can be deceiving. Let me explain.
Why would we need to remodel a lovely looking home?
Upon closer inspection, you begin to see some warts. Particularly if you look at all the wall patch jobs done on this 33-year-old residence. The laminate flooring was only 3 years old, however it was cheap and a color Dianne disliked. The entryway had old style and chipped 8-inch tiles, and the bedroom next to the hallway had a stained carpet.
Had I panned out the angle of the picture a little more to the left, you would have noticed the gnarly little problem with the wall.
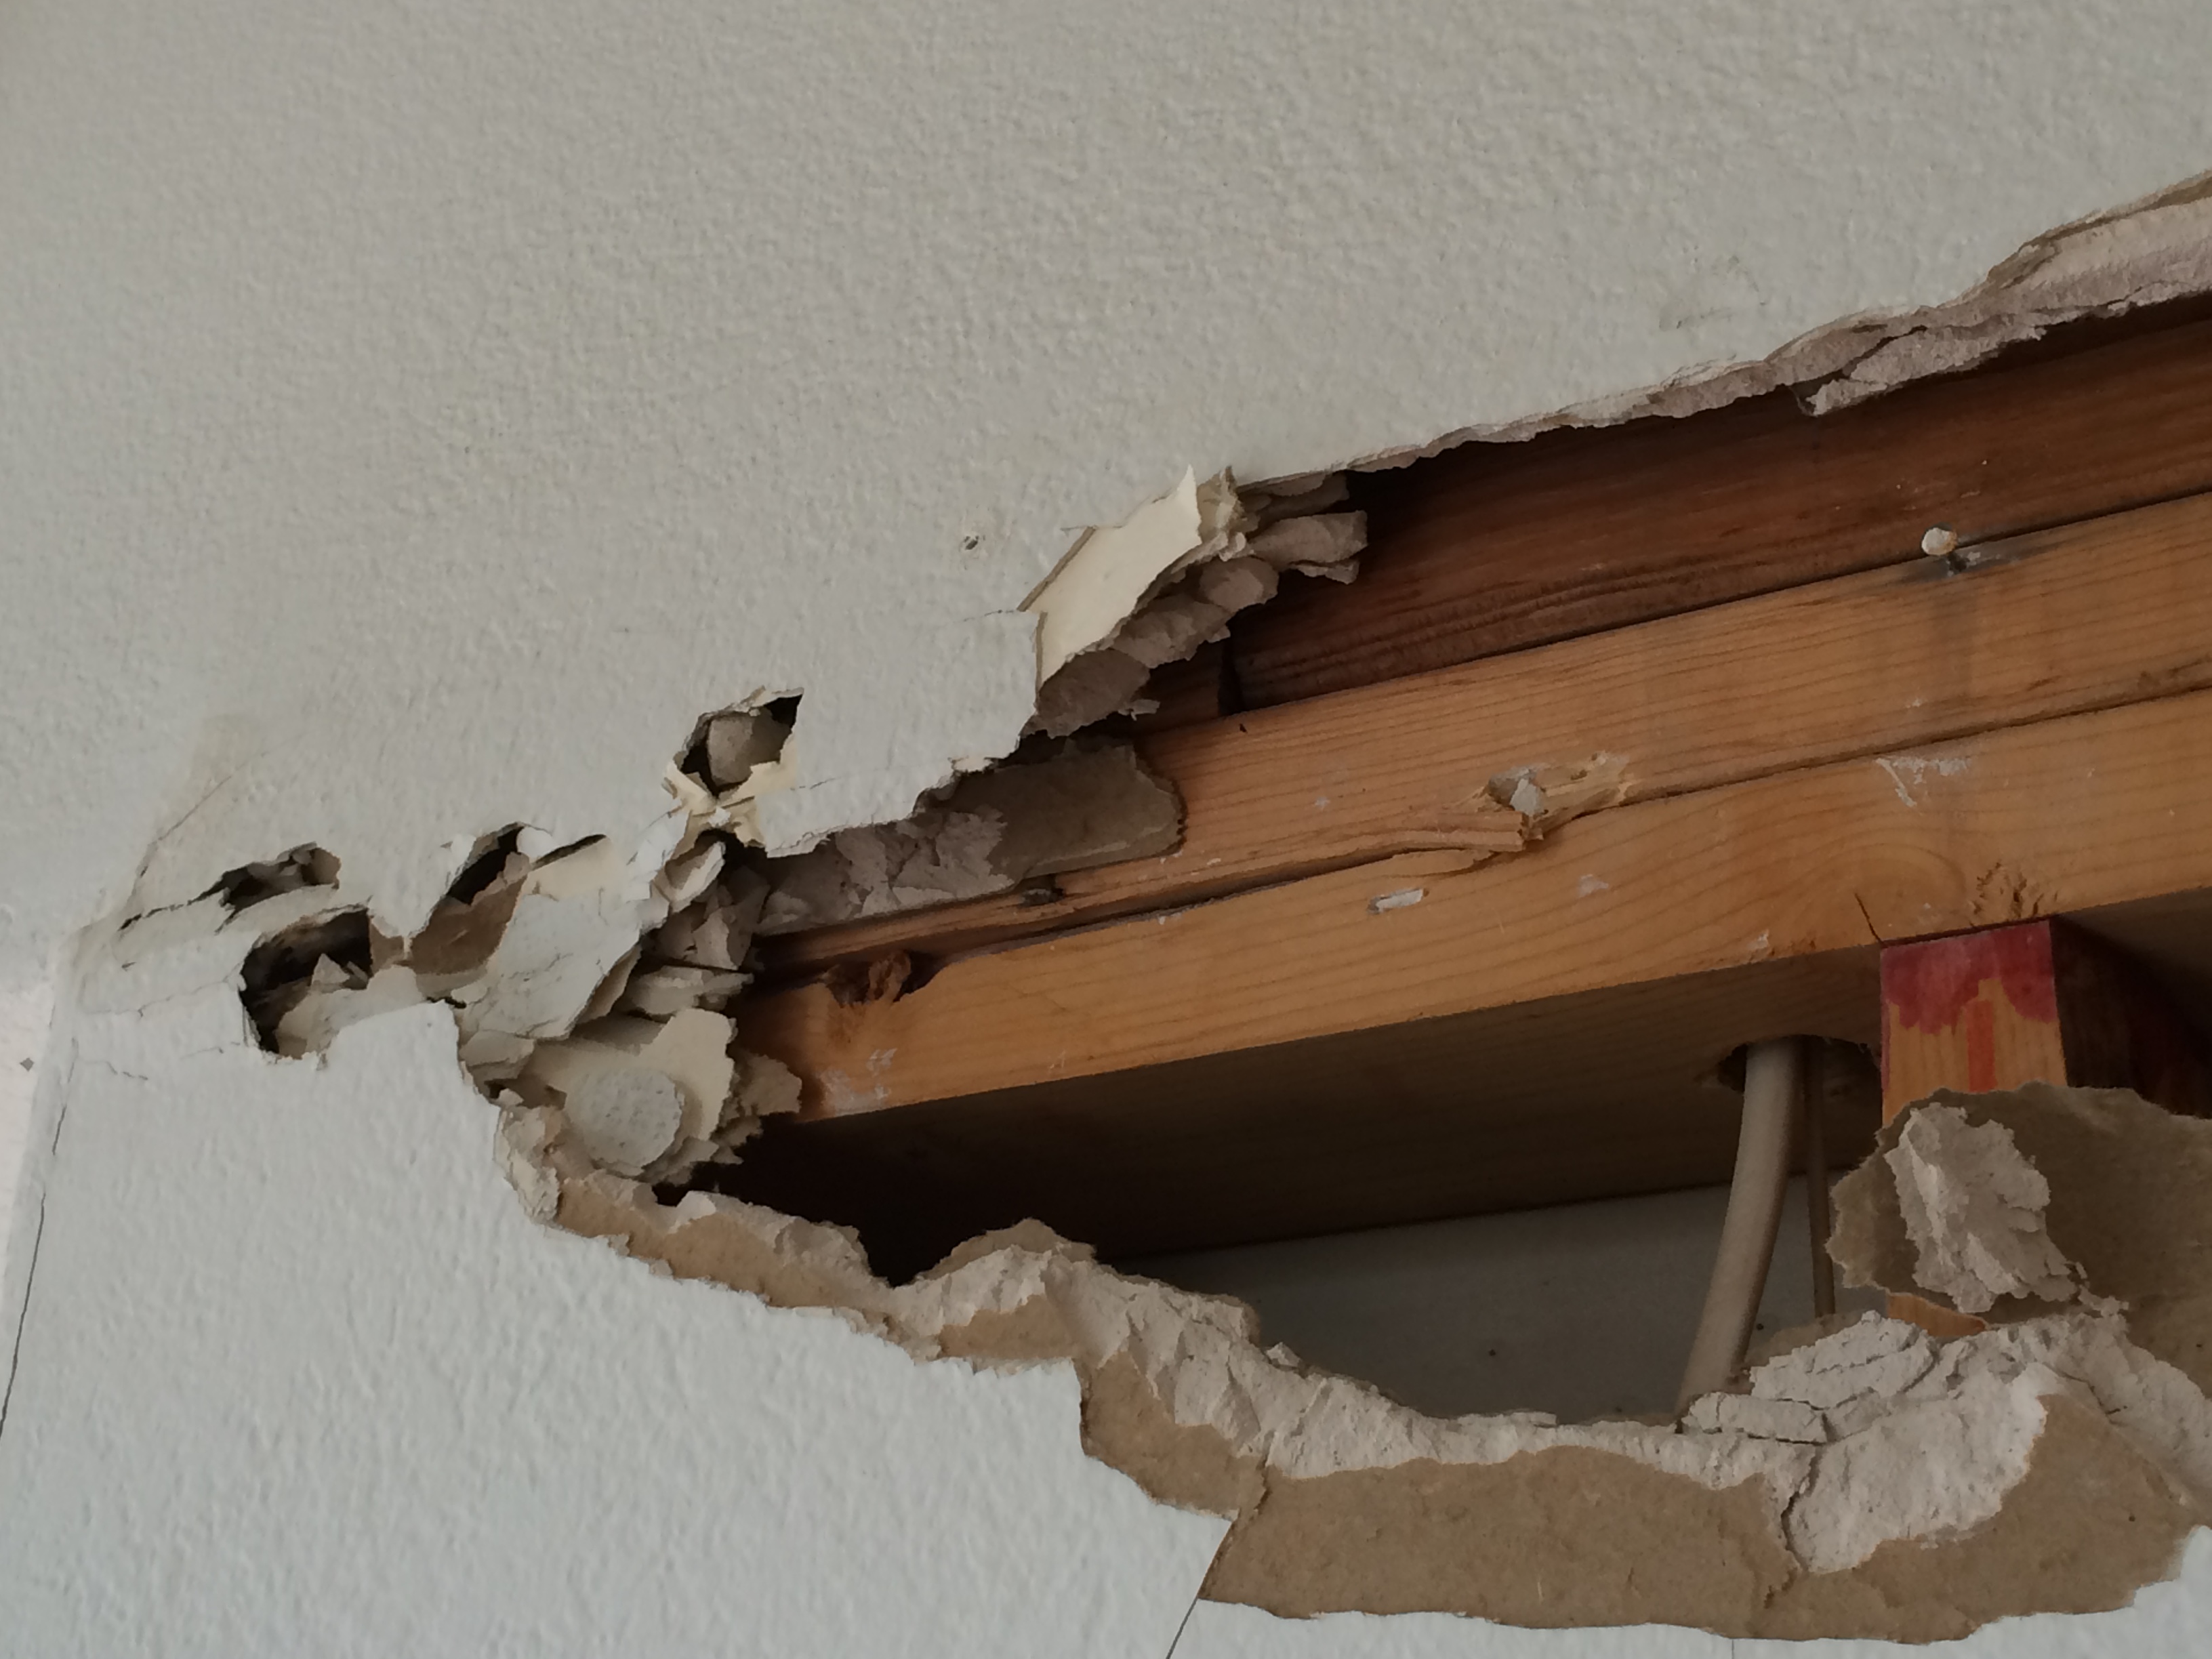
The wall was bowing out over an inch on the main load-bearing wall in the living room. This wall supports the entire upstairs master suite and roof. Without the benefit of opening it up, many worst-case scenarios were running through every contractor’s mind when they looked at the wall. We anticipated serious structural problems that would require an architect and structural engineer to come up with a new “engineered beam” to replace what was present. Our in-laws did not want to deal with this issue or the process of finding someone to resolve the problem. They priced this problem into the sales price for buying the place.
The good news after opening up a small section, it was as simple as the drywall settling, since the original builder failed (or forgot) to install drywall screws at the inside wall header. We opened up the entire section to make sure we had no other problems.
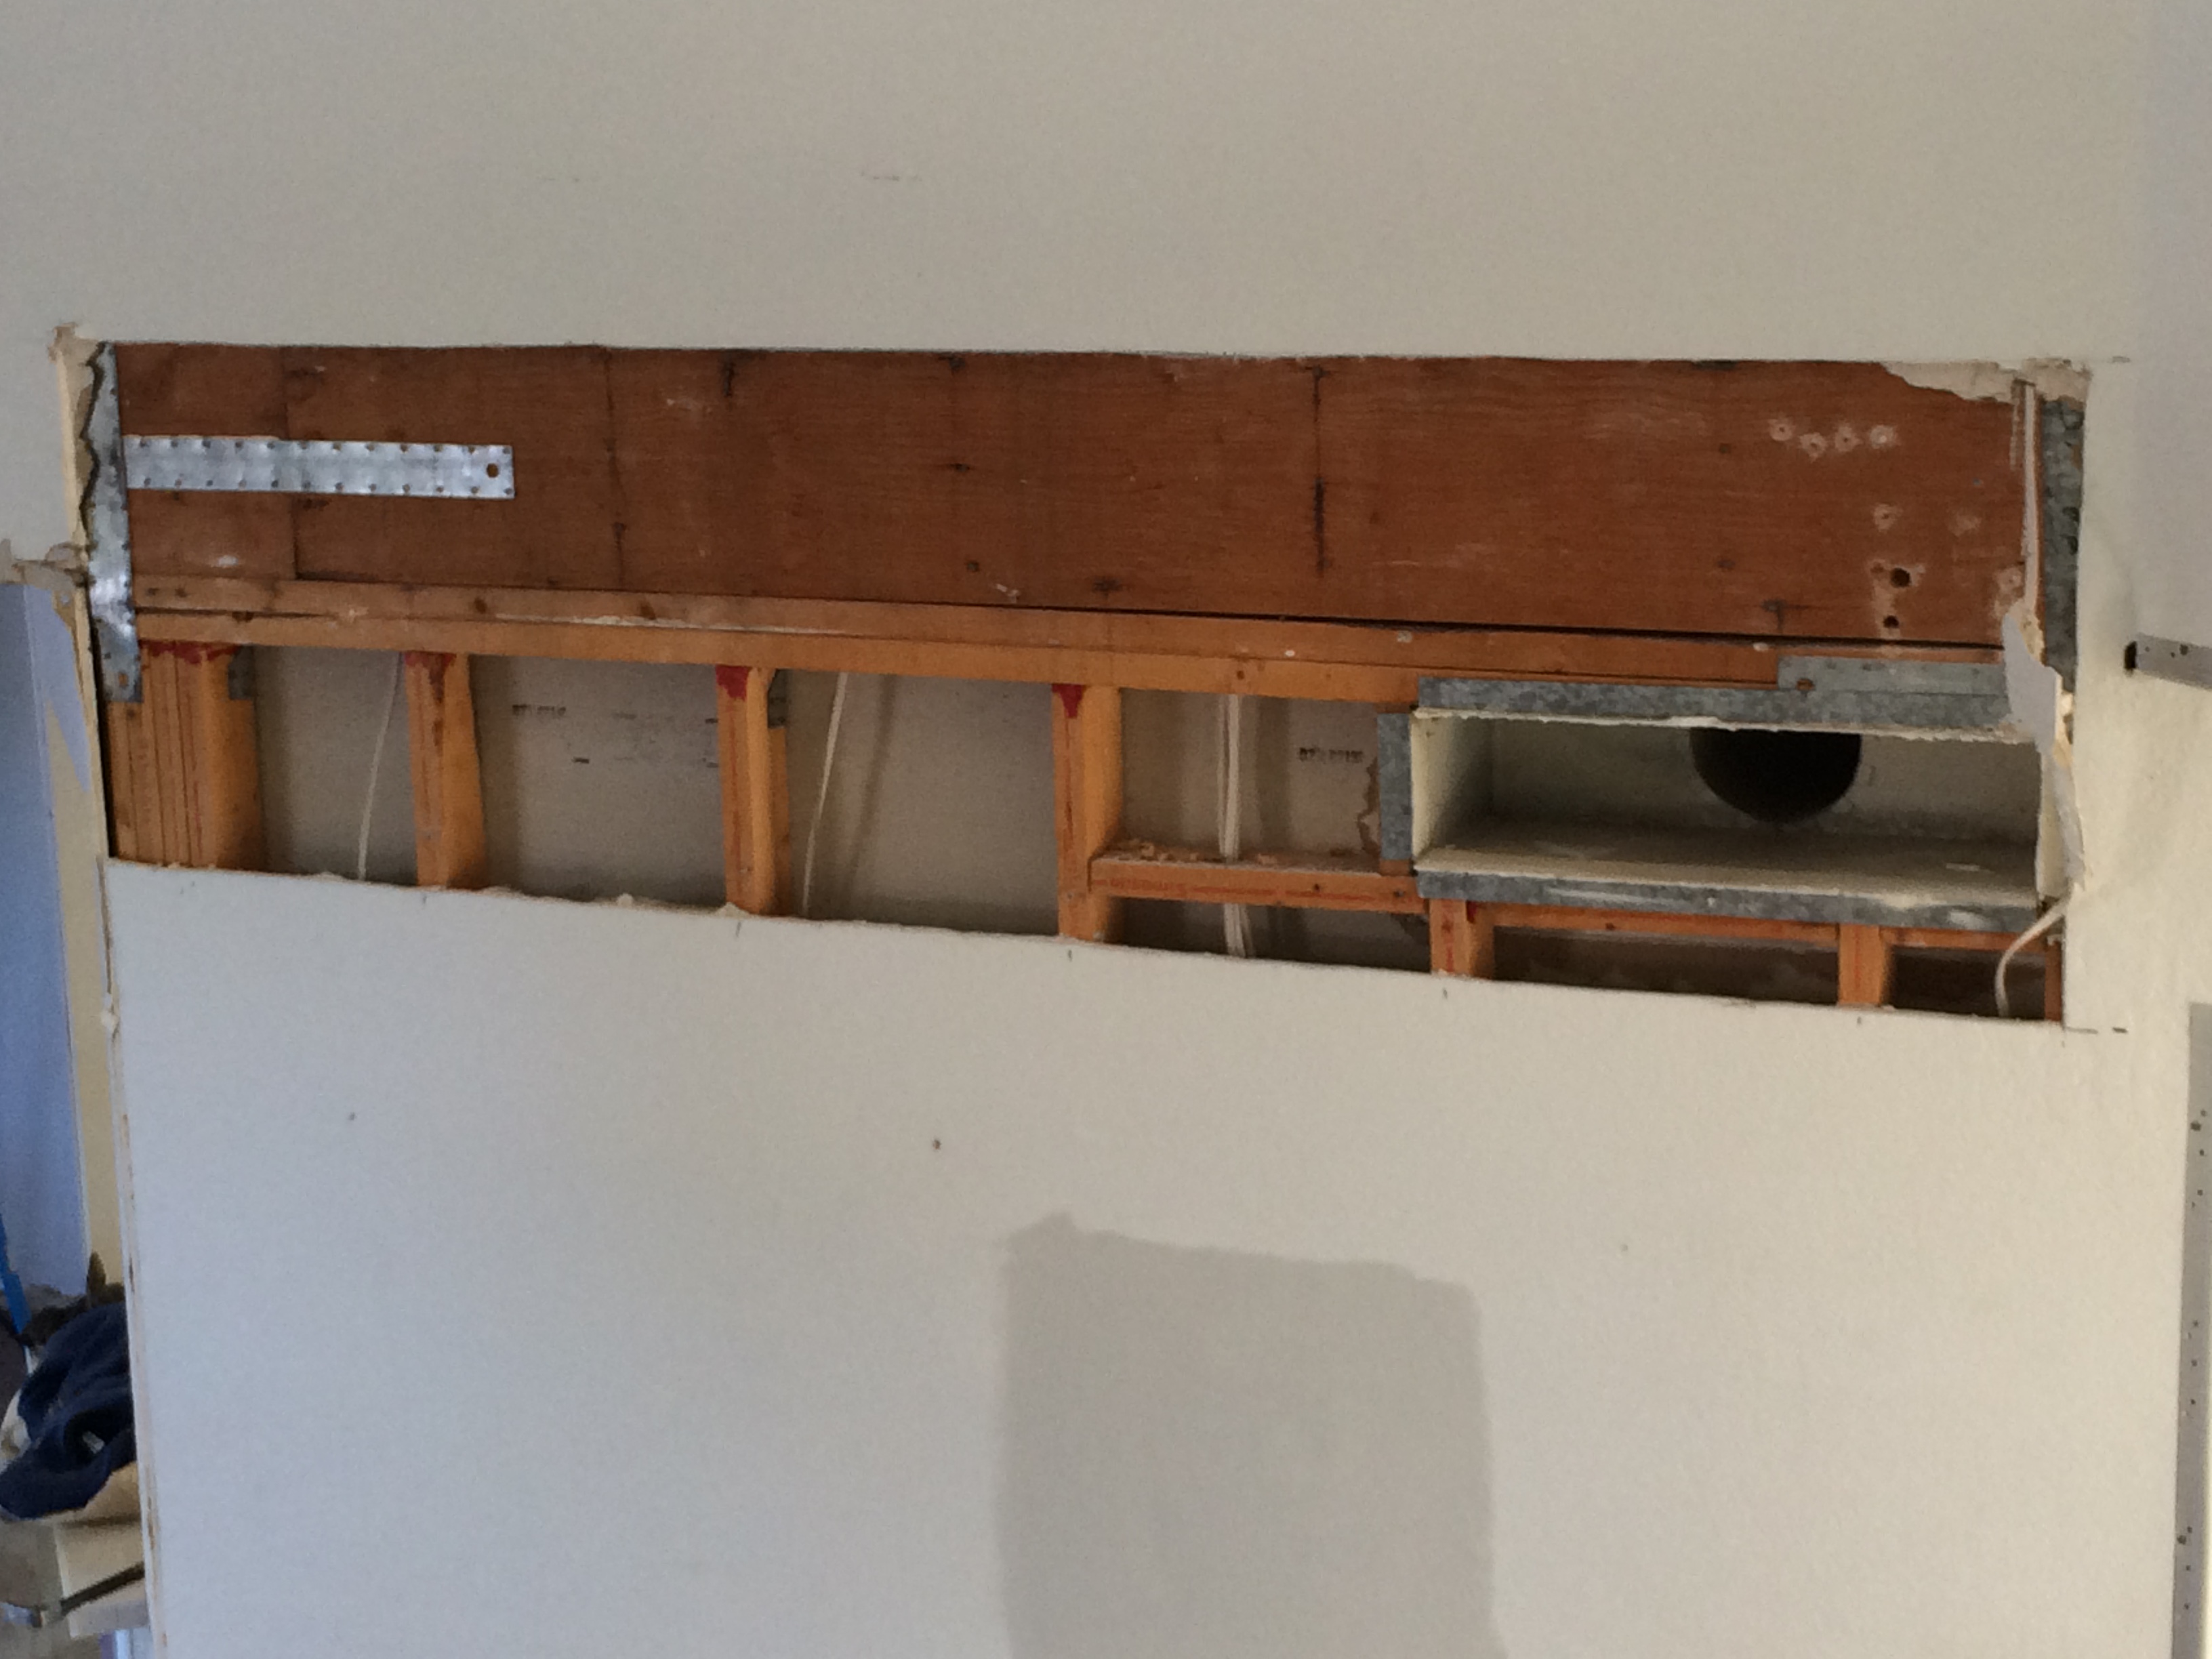
We started counting our lucky stars, feeling we dodged a major expense. But wait, there is more to the story….
Dealing with water damage
About four years ago, a window that had previously leaked and had discoloration between the dual panes, was replaced. The original problem was attributed to the roof that was also repaired and replaced eight years prior. We decided to tear open the wall to see what surprise lurked behind the drywall. For those homeowners with weak stomachs and who clutch their checkbooks tightly, please scroll forward to the next paragraph!
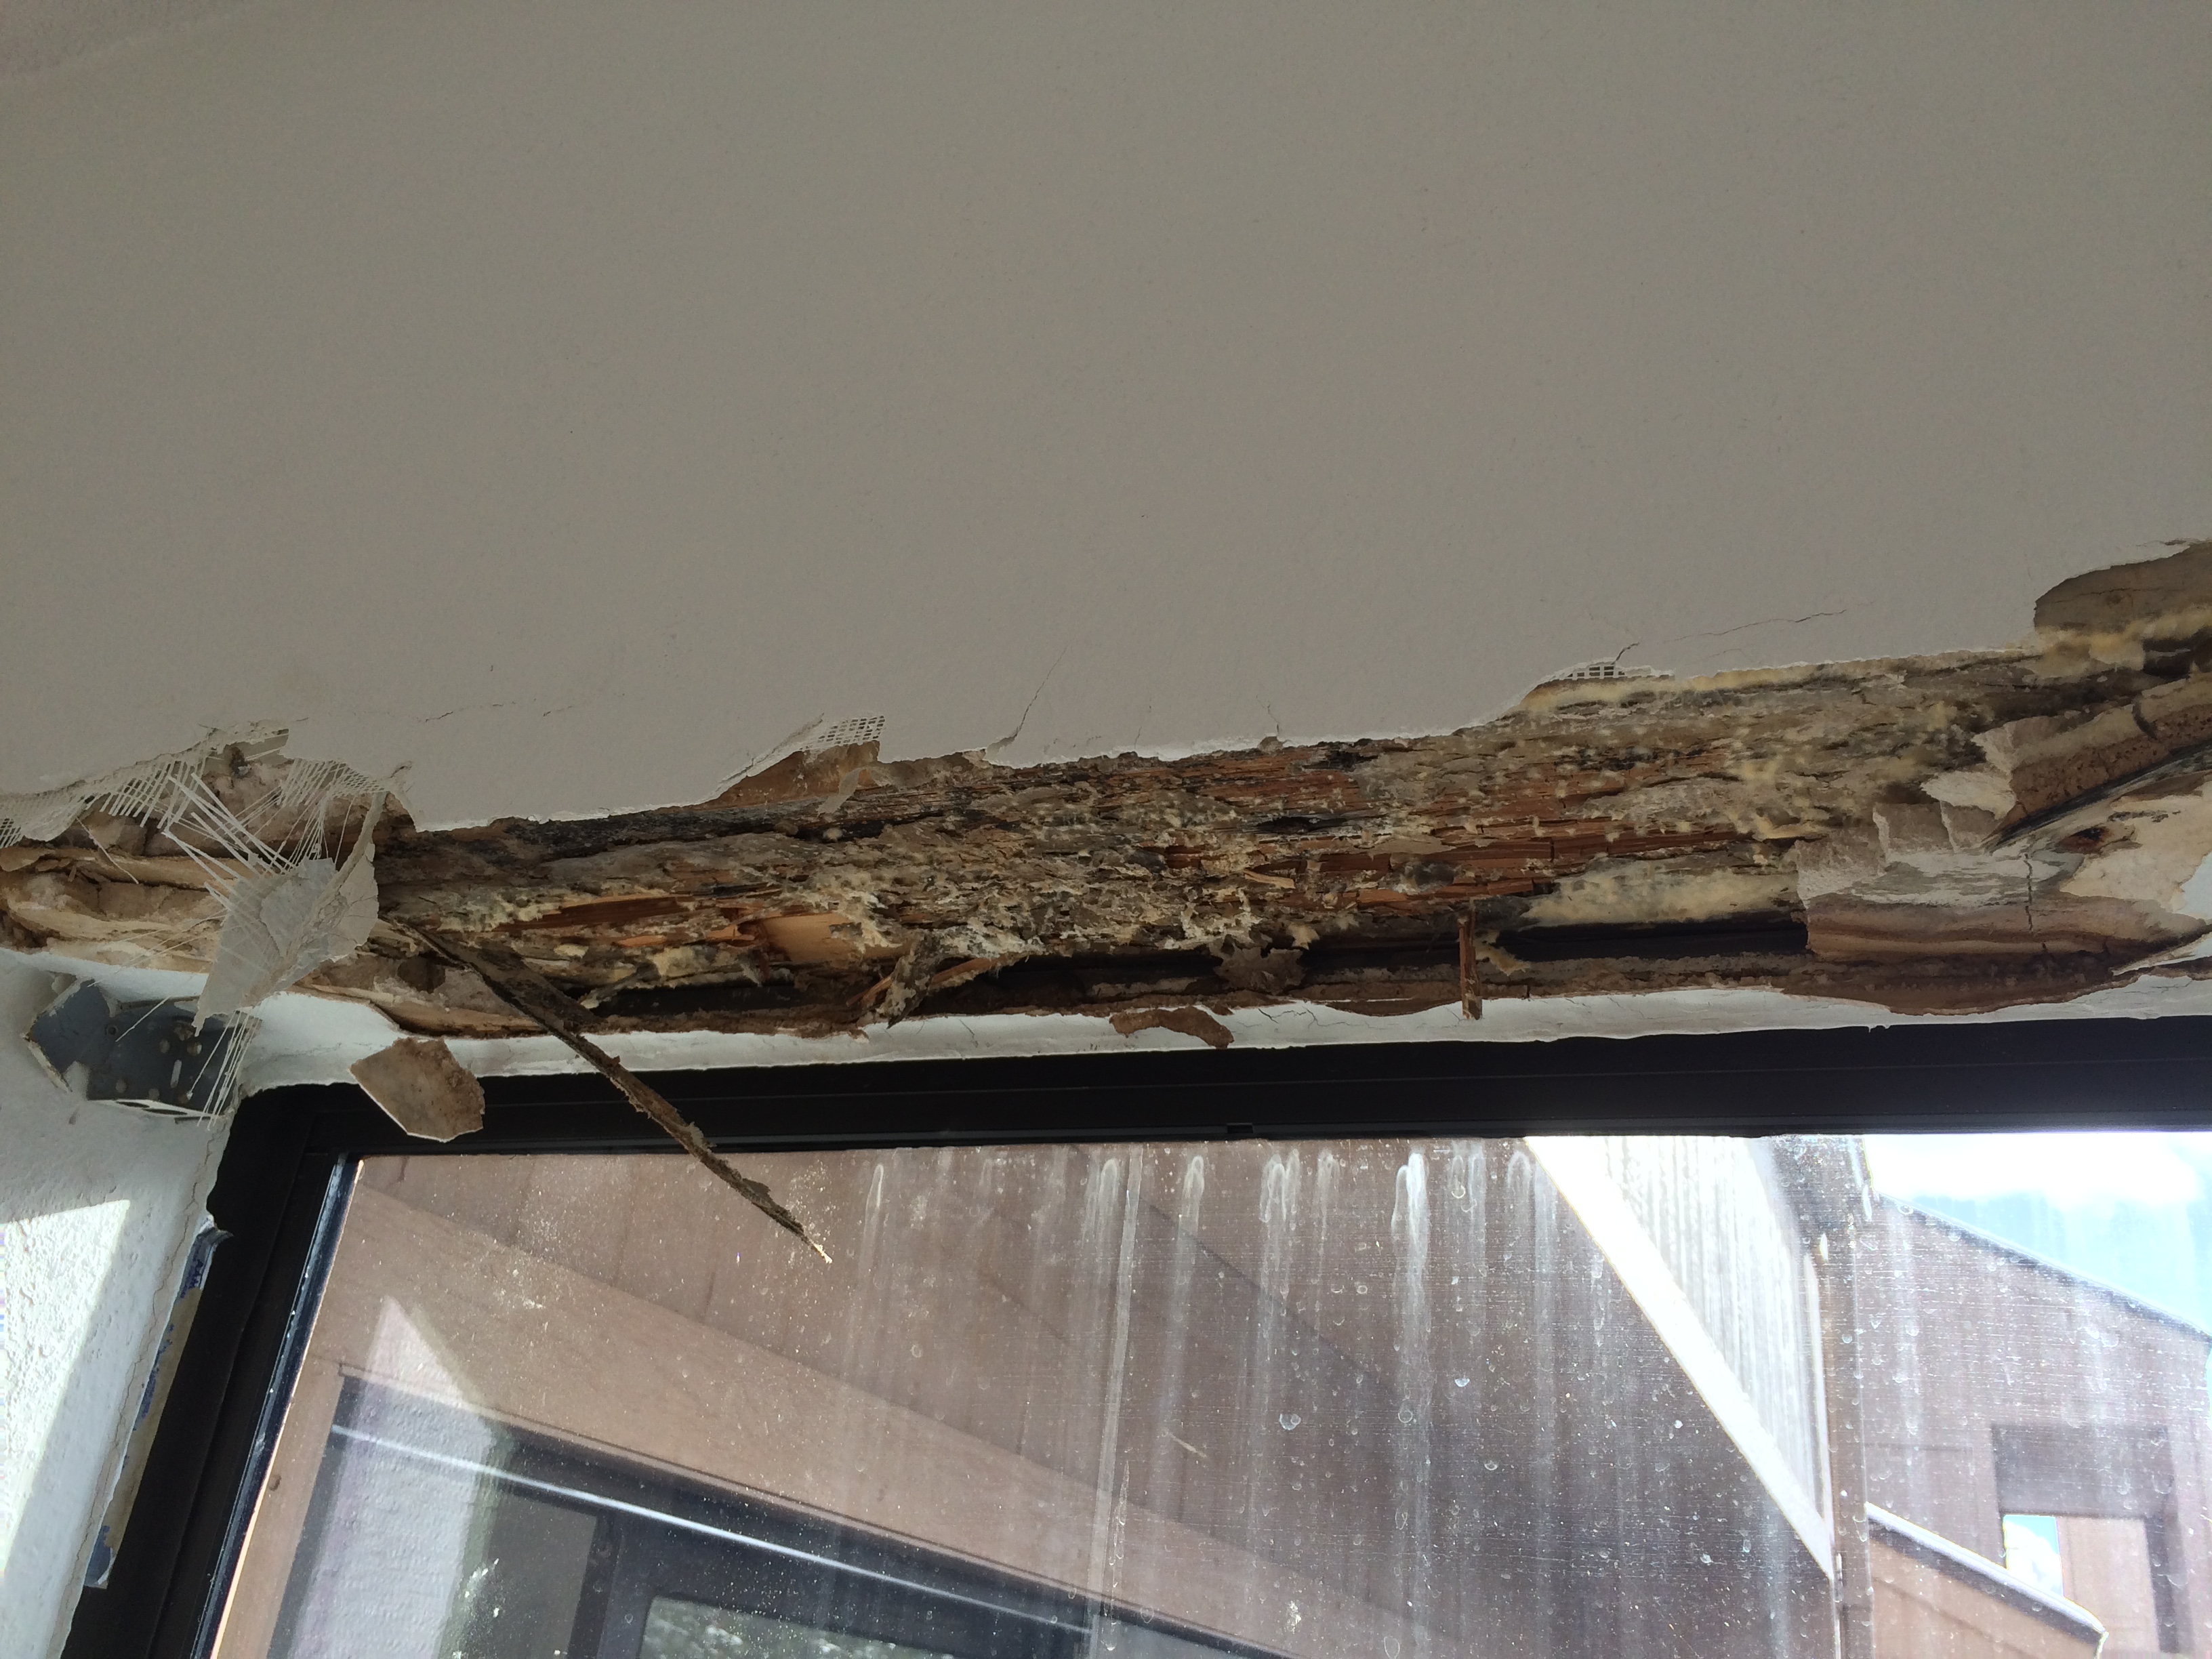
This was not good! We tore the sheetrock back all the way to the upstairs floor joists at the top of the ceiling. Fortunately, it only continued with this damage for about four more inches above the window frame. We removed all the discolored wood, replaced it, and closed the wall back up. After some additional sheetrock work and adding the new corners, it was finished.
The wall is now good as new and painted!
We are modernizing the look
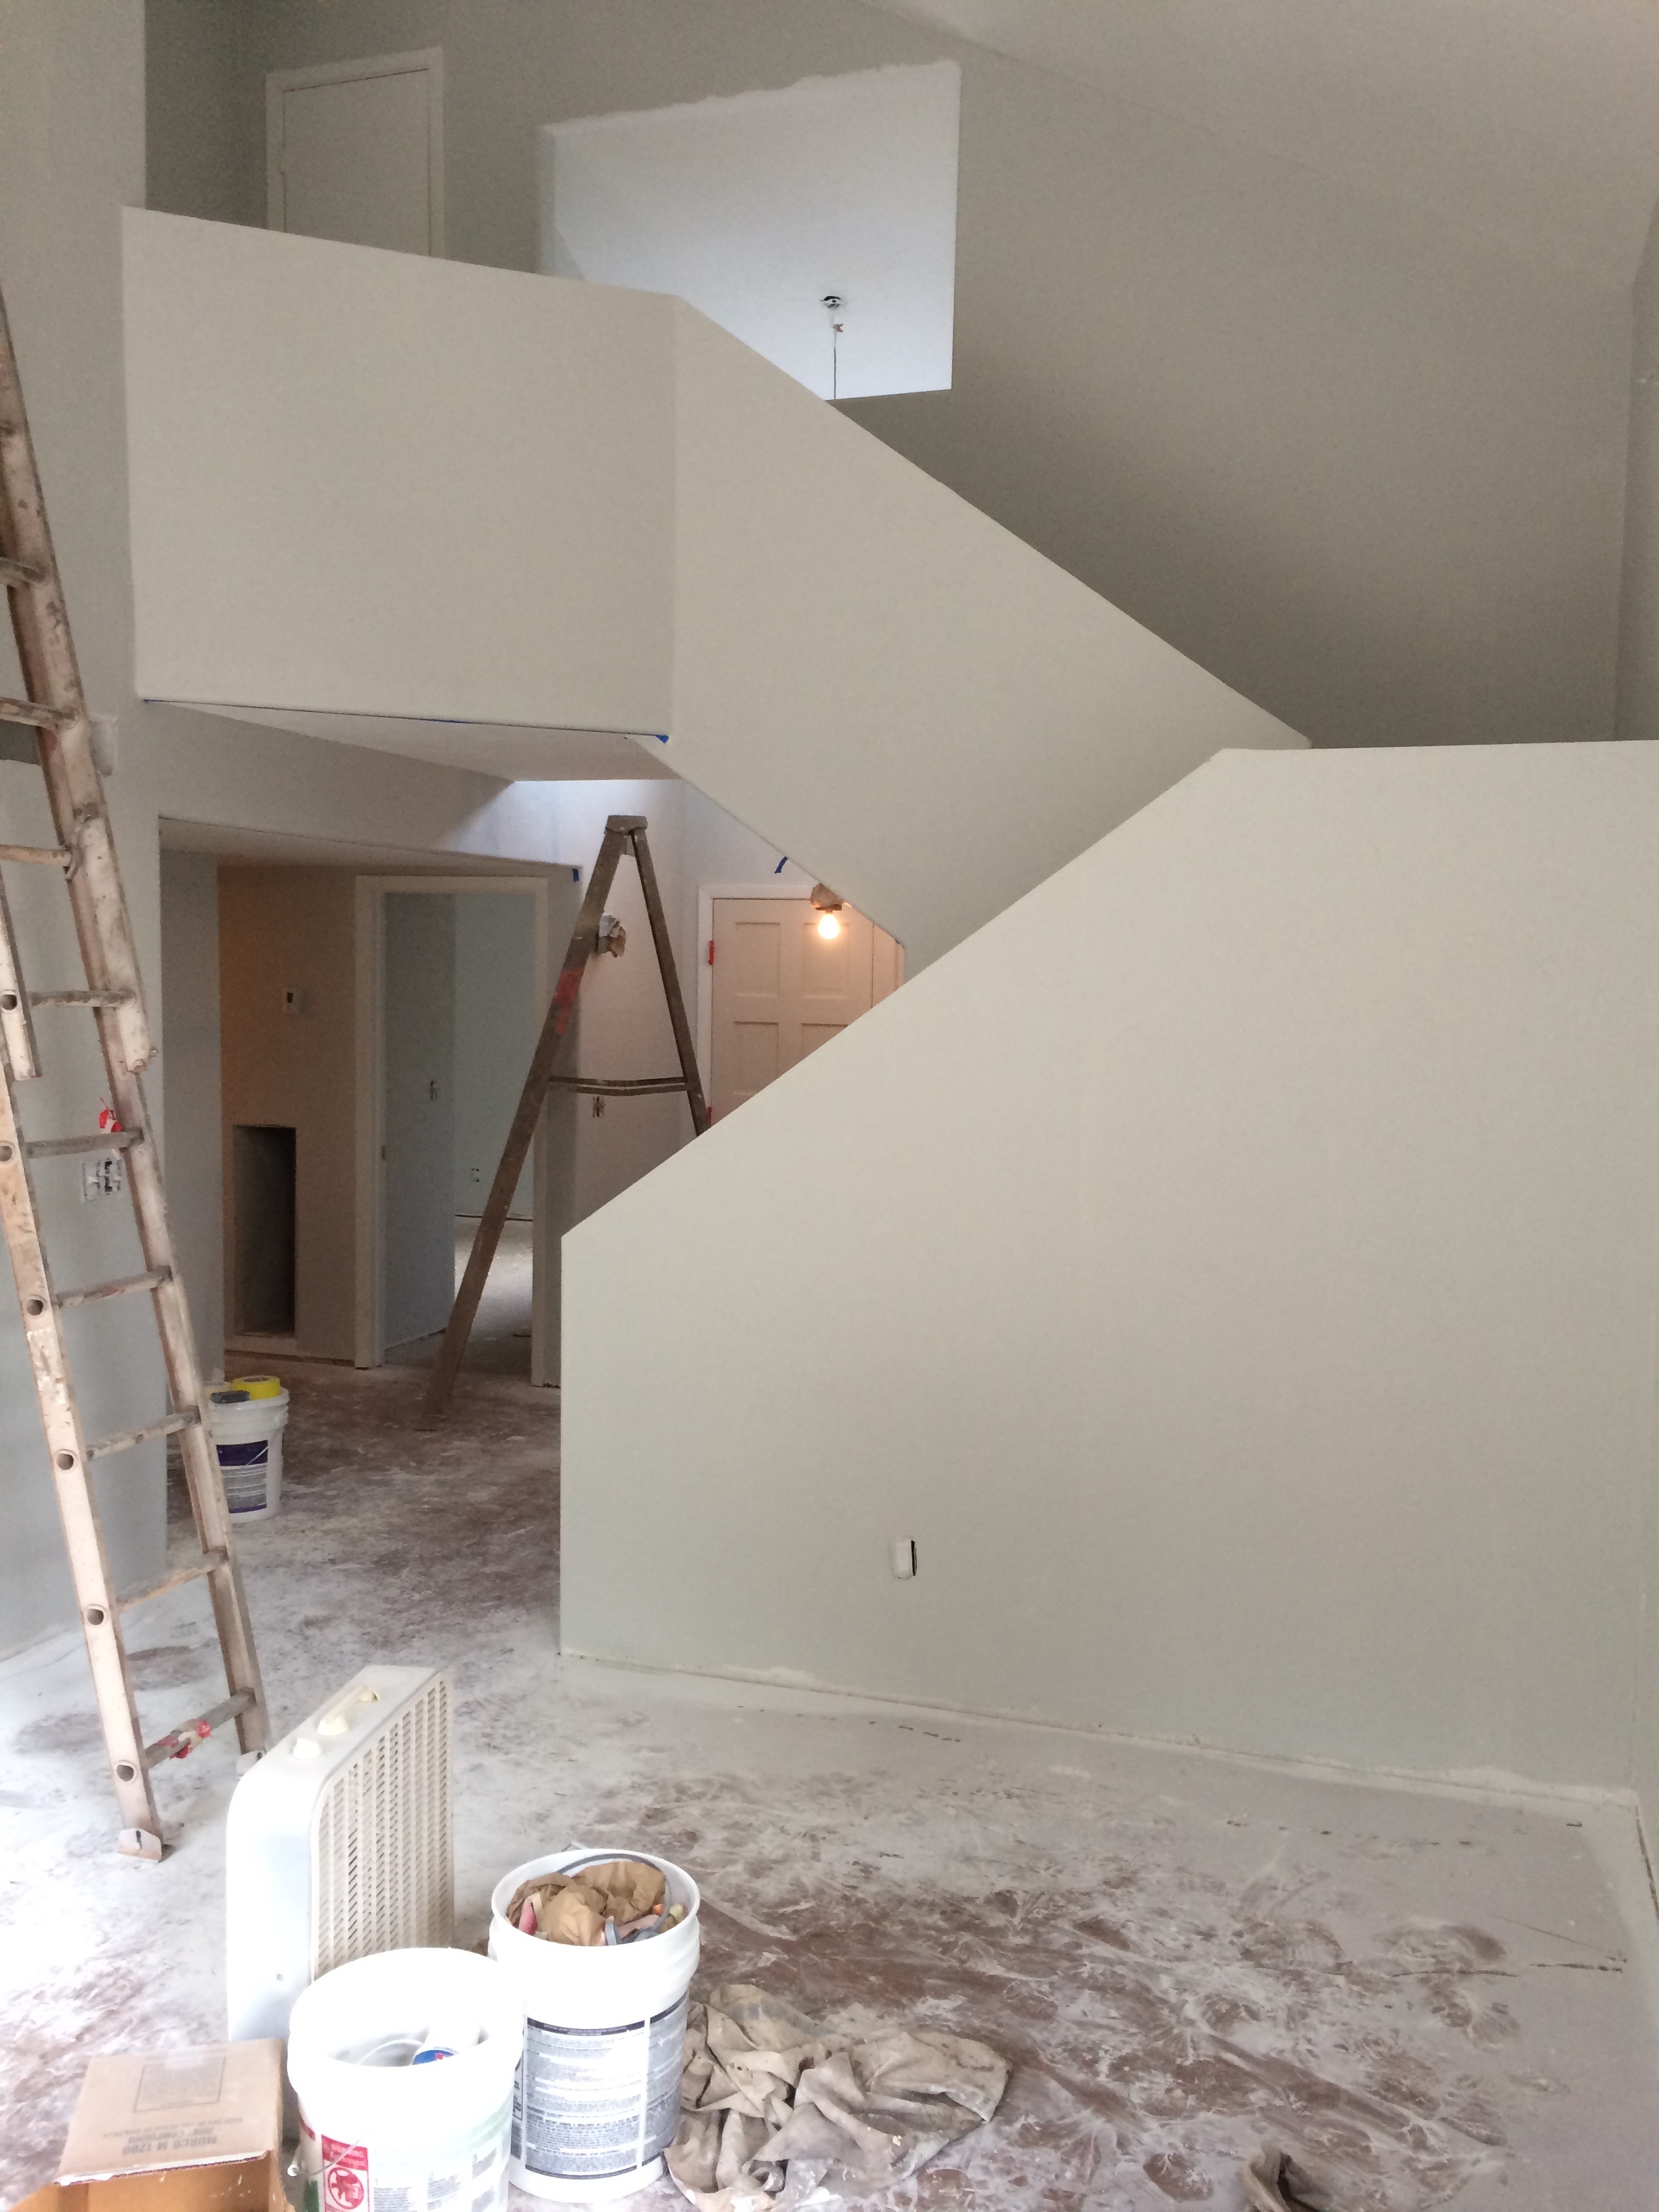
The living area and stairs provide a unique look with an open style floor plan. Our plan from the start was to clean up all the drywall botches, dents, and holes. We would remove all the corners (there were a lot of them) and install new “bull-nose” rounded drywall corners. All of the base cove trim would be removed, leaving the door moldings alone.
Take a look at the “in progress” photo:
The plan was to texture the entire house, except for the kitchen and two bathrooms, with a medium style skip trowel look. Once completed, we would paint the ceilings and trim in white, the walls in a modern grey, and one accent wall in the dining room a darker grey in the same color palette. BTW – Dianne is the color person here. I suffer from variations of red/blue colorblindness!
Let’s not forgot about the lovely popcorn texture (AKA-cottage cheese or stucco) plastered on multiple ceilings. Popcorn ceilings were great 30 years ago or as a snack item to enjoy watching the latest Star Wars movie. It is so 1970’s now! I don’t think any new houses are being built with that texturing style for ceilings.
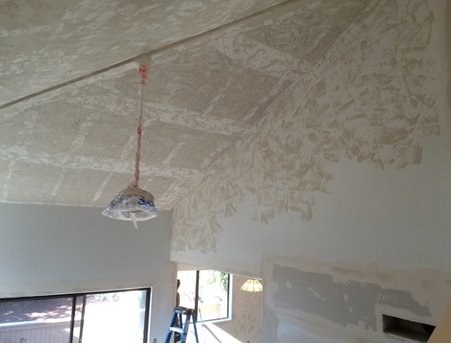
The height of this 20-foot ceiling required some scaffolding to reach. Disclaimer right now: there is no way I would have attempted all this drywall work myself. I found a sub-contractor for this and the painting. I am working as the manager of this remodel project. Years of managing and completing rental property repairs myself, and working with vendors and contractors, have given me some decent skills and experience for these projects.
The floors have to go!
The drywall and painting was a dirty job that took 9 days to complete. The crew varied in size from two to five people on a given day. They all took Sunday off.
Our plan was to get all this dusty work completed before installing any new flooring and moving in. We did not relish the thought of cleaning up drywall particles from our belongings for the next year. The biggest challenge to overcome was the short period of time and dealing with Christmas and New Year’s during this remodel. The day we finished painting, the flooring people began. In fact, they had their materials and tools in place the day before to be ready to start immediately.
The existing flooring in the home consisted of one type of ceramic tile, two styles of linoleum, some laminate, and two kinds of carpet. The stairs were also carpeted the same as the master bedroom. Except for the laminate, all of the flooring was in bad shape.
We are putting new floors in two-thirds of the home now in our Phase #1 remodel. This will allows us to have the common living areas completed before we start Phase #2. We will also install all new trim in the Phase #1 areas once the flooring work is complete.
Phase #2: Remodel the kitchen and two bathrooms
There is a Phase #2 to this remodel madness. (Probably a Phase #3 as well) My in-laws live in the same complex about 400 feet away and are “snow-birds”, staying in Sedona six months of the year and in Colorado the other six months.
We will take advantage of their leaving Sedona around May 1 to start Phase #2 of our remodel project, tackling the kitchen and two bathrooms. The plan is to replace the cabinets, appliances, sinks, faucets, floors, essentially everything in those rooms during this phase. We may even open up a kitchen wall into the dining room that will give it the “open concept” feel that all those remodel shows tout!
We have a couple months to come up with the final design ideas to price this out and get everyone lined up for the work. We will then have use of the kitchen and bathrooms at my in-laws while our remodel work is in progress. During the day, Hershey and I will work from their home to make life much easier.
Conclusion
I am writing this post before the flooring work is completed. We have so many projects in the next several weeks to plan for and complete. Then only days after we move, I am heading to Colorado for both work and pleasure.
This has been a fun – yet challenging experience. We are progressing rapidly on the first phase of the remodel project that must be completed prior to moving into our downsized living space. Unfortunately, we will not close escrow on our current home until three days after we have moved. So we have our fingers crossed that this will all work out.
Hey, what could possibly go wrong? 🙂
Looks great. I’m sure you will come to love the place.
We are already enjoying the place – especially after a couple days of digging out of boxes. Things should settle down for us over the next couple weeks!
Wowza, that’s a lot of work! Then again, we had to make some upgrades to qualify our house for the FHA loan we were getting. While we were at it, we did some cosmetic repair too: having all the walls painted (one room was, for lack of a better term, an angry robin-blue color), the outside painted and tile installed. The house looked pretty bad, and I had to stay in guest house while it was being completed. Meanwhile, Tim was up in Washington helping his parents with the move.
I was just glad when we had no paint fumes and toilets again.
You definitely know how much work is involved. I know you and Tim have been at it for a while now. Also, Phoenix is quite a culture shock from Alaska and Seattle! I tell Dianne all the time, the remodeling on the house stops the day you move. Until then it never really ends.
We are hoping to start and finish phase #2 by May of 2016. Time will tell if that really happens. 🙂